Setting Up Your Home Display Shelving for Maximum Stability

Are you worried that your heavy collection of graded games or high-end statues might actually cause your shelving to bow or collapse? This guide covers how to select, build, and organize your display shelving to ensure your collectibles remain safe, level, and secure. Getting your display setup right isn't just about aesthetics; it's about protecting the physical integrity of your investments.
A heavy collection—think graded Wata or CGC games—puts a massive amount of weight on a single footprint. If you don't plan for it, you'll end up with sagging shelves and potentially broken items. We're looking at weight distribution, material choices, and structural stability.
How Much Weight Can Display Shelving Hold?
The weight capacity of your shelving depends entirely on the material of the shelf and the distance between the supports. Most standard particle board or thin MDF (Medium Density Fiberboard) shelves will sag under the weight of a large collection of heavy-duty acrylic cases or thick boxed games. If you're displaying heavy items like heavy-weight statues or large-scale LEGO sets, you need to know the specific load rating before you start loading them up.
Most retail-grade shelving units have a weight limit per shelf, often ranging from 15 to 40 pounds. However, collectors often push these limits. A single shelf filled with graded retro games can easily exceed 30 pounds. If you use a cheap, lightweight unit, the wood will eventually "creep"—that's when it bends permanently under constant stress.
To avoid this, look for heavy-duty metal shelving or solid wood. If you're using IKEA Kallax units (a favorite for many of us), be aware that they are great for looks but can struggle with extreme weight if you don't anchor them properly. For a more professional setup, consider industrial-grade wire shelving or custom-built wooden units.
Here is a breakdown of common materials and their typical performance:
| Material Type | Strength Level | Best Use Case |
|---|---|---|
| Particle Board/MDF | Low to Medium | Lightweight cardboard boxes or small figures |
| Solid Wood | High | Heavy graded games and large collections |
| Metal (Steel/Aluminum) | Very High | Industrial-style setups and heavy statues |
| Tempered Glass | Medium (Brittle) | Displaying light, high-value items (visually clean) |
Don't forget that even if the shelf can hold the weight, the floor underneath it has to support it too. If you're putting a massive, heavy-duty shelving unit on a standard apartment floor, keep an eye on the total footprint. It's a lot more than just a single box on a desk.
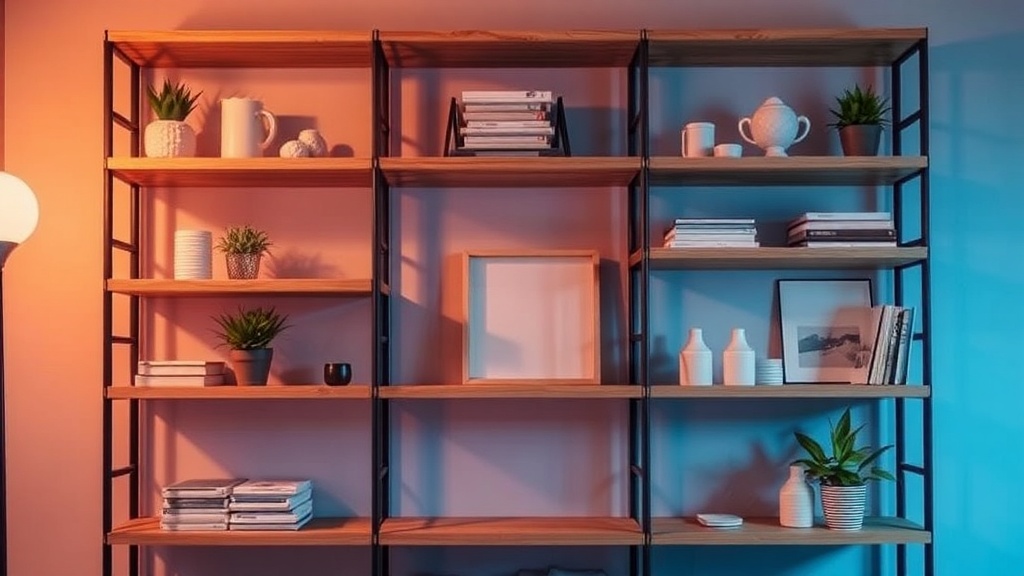
What Is the Best Way to Arrange Collectibles for Stability?
The best way to arrange your collection is to place your heaviest items on the lowest shelves to keep the center of gravity low. This method prevents the shelving unit from becoming top-heavy and tipping over. It also makes the entire structure more stable during accidental bumps or even minor seismic tremors.
Think of your display like a pyramid. The base should be the "anchor" of your setup. If you have a collection of heavy, large-scale items—like high-end resin statues or heavy-duty graded games—they belong at the bottom. Smaller, lighter items like Funko Pops or standard unboxed games should occupy the higher shelves.
A few rules for arranging:
- The Bottom Tier: Use this for your heaviest "anchor" pieces. This might include large statues or heavy-duty storage bins.
- The Middle Tier: This is your eye-level zone. Place your most visually striking, medium-weight items here.
- The Top Tier: Keep this for lighter items or items you don't need to access frequently. This keeps the center of gravity low.
- Spacing: Don't crowd items too tightly. If items are touching, they can rub against each other and cause micro-scratches.
I've seen people try to put a massive, heavy collection on the top shelf of a tall, skinny unit. It's a recipe for disaster. Not only does it look awkward, but it also makes the unit incredibly prone to tipping. If you're displaying expensive items, you'll also want to consider how much light they're exposed to. For instance, you should avoid direct sunlight on your collection to prevent fading and heat-related damage to plastic or cardboard.
How Do I Prevent My Shelving from Tipping Over?
You prevent tipping by anchoring your shelving unit to a wall using a wall strap or an L-bracket. This is non-negotiable if you have tall, narrow units or if you live in an area prone로 to tremors. A heavy collection adds significant momentum to a shelf if it starts to tilt, making it much harder to stop a fall once it begins.
Wall anchors are inexpensive and easy to install, but they're often overlooked. Even if a shelf feels "sturdy" when you're setting it up, a collection can grow over time. A shelf that was stable with ten games might become a hazard when you add fifty more. Always assume your collection will eventually weigh more than you think it will.
If you're renting and can't drill into the walls, look into "no-drill" furniture straps or heavy-duty tension rods, though these aren't as secure as a permanent mount. If you're using a glass-fronted cabinet like those from IKEA, the weight of the glass itself adds to the tipping risk. Always check the Wikipedia entry for furniture safety or similar safety guidelines to understand the risks of tip-overs.
It's also smart to use non-slip mats or rubberized pads under your items. This isn't just for stability—it's to prevent your items from sliding around when you open a door or move the shelf. If you have heavy acrylic cases, a little bit of grip goes a long way in keeping things centered.
When you're setting up, don't just look at the shelf. Look at the floor. Is the floor level? If you're using an older house with uneven floors, your shelving unit might have a slight lean. A slight lean is fine for a small shelf, but for a massive collection, it's a major stability issue. Use adjustable feet or furniture shims to level the base before you add your first item.
One thing to watch out for is the weight of the "empty" shelf. If you're using a modular system, ensure the shelves themselves are rated for the weight you're planning to add. A common mistake is buying a beautiful display case that looks great but is actually quite flimsy. If you're displaying graded games, the weight of the plastic slabs adds up fast. A single slab might not be much, but a hundred of them is a different story entirely.
If you're using a display case with glass doors, make sure the hinges are high quality. Constant opening and closing of a heavy door can eventually cause the door to sag or the hinges to fail. This is especially true if the door is holding a lot of weight or if the glass is heavy tempered glass. It's worth spending a little extra on the hardware to ensure your display stays functional for years.
When you're done, do a "shake test." Give the unit a very gentle nudge. If it wobbles or feels unstable, you need to add more weight to the bottom or anchor it to the wall immediately. It's much better to deal with a wobbly shelf now than to deal with a broken collection later.
Steps
- 1
Calculate Total Weight Capacity
- 2
Select Material and Depth
- 3
Secure to Wall Studs
- 4
Distribute Weight Evenly